Home VPN Setup with PFSense
Introduction
Setting up PFSense as a VPS within your home environment will provide several benefits. First, all your home network traffic will be protected by a well developed and capable next generation firewall. PFSense has been around since 2006 and has continued to grow in support and development making it an extremely advanced open source security solution. Although I will not go into it within this post, PFSense has a package manager that can be used to install additional tools like Snort, Suricata, pfBlocker, Squid and more. Second, it will allow you to access your home network from anywhere in the world. This will allow you to reach any home file servers and remote control systems via RDP or SSH. Finally, you can configure the VPN to route all traffic through the PFSense firewall, so all your connections from across the world can be secured by your home firewall and any packages you have installed. All of this for no montly cost as everything in this guide is either open source or a free service.
Requirements
- PFSense Firewall - I am using this for my setup as AES-NI is recommended and the specs are adequate for my purposes
- ISP that gives you a public IP address (static OR dynamic) and doesn’t mind you port forwarding
- WiFi Access Point to give devices connectivity
- Familiarity with networking and installing an operating system to a device
Set Up a Dynamic DNS Account
This is only for those that do not pay for a static public IP address. If you are unsure, you likely have a dynamic address. I will be using FreeDNS as it is simple to configure for this purpose and free. After making your account, create a subdomain A record.
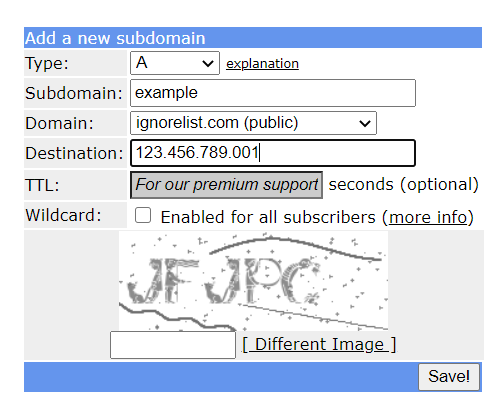
Then, go to Dynamic DNS in the menu. Copy the “Direct URL” for your A record. You will see something like https://freedns.afraid.org/dynamic/update.php?YOUR_CODE_HERE. Copy only your code and save it for later.
Installing PFSense
First thing you will need to do is install PFSense onto whatever Firewall you will be using. As this is pretty dependent on the Firewall you have chosen I will not go into great detail but use the downloads provided here. Once you have PFSense installed onto the Firewall, connect to the console port to access the PFSense CLI configuration menu.
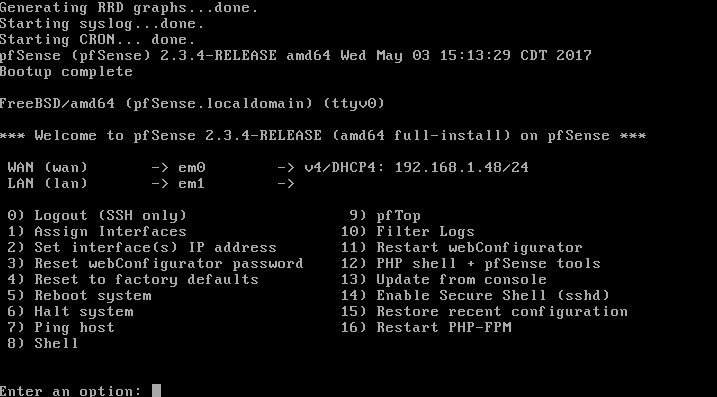
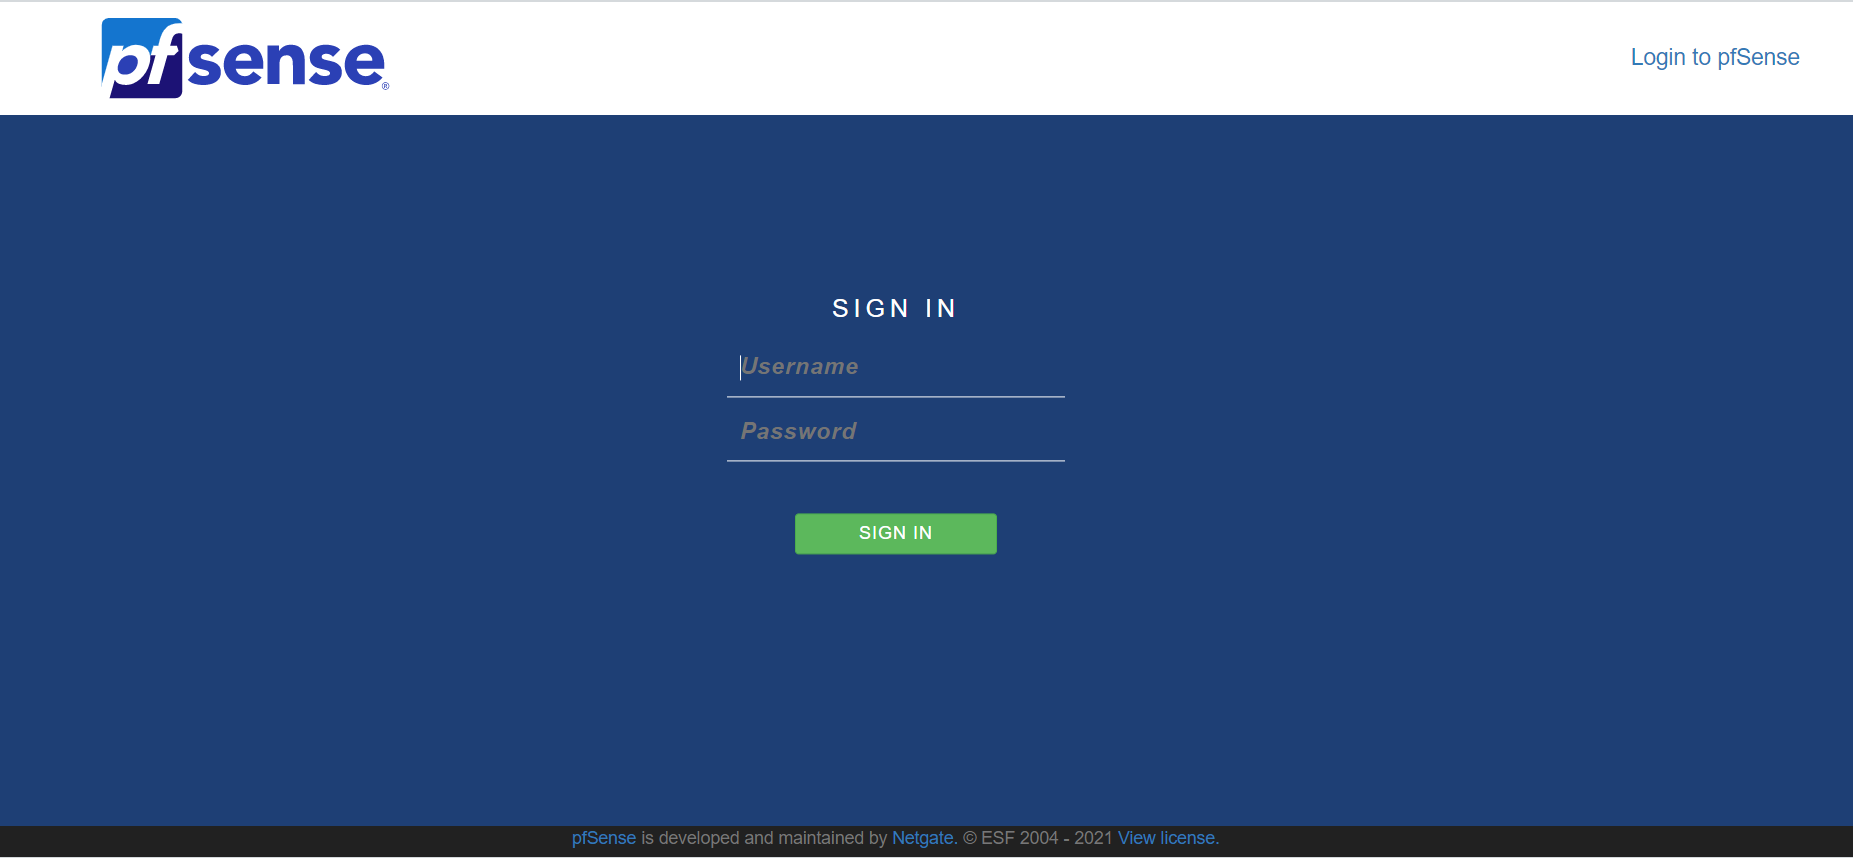
Go through the initial steps of assigning the interfaces for LAN and WAN (option 1), and setting up interface IP addresses (option 2). It is important to either assign yourself a static IP address in the WAN subnet, or setup a DHCP reservation on your modem. This will allow port forwarding to work properly. Once these are configured, you will be able to access the web GUI through the LAN IP address which will prompt you with a login as seen below.
Login with the default credentials (user:admin password:pfsense) to begin setting up the firewall.
Connect Your Dynamic DNS Server
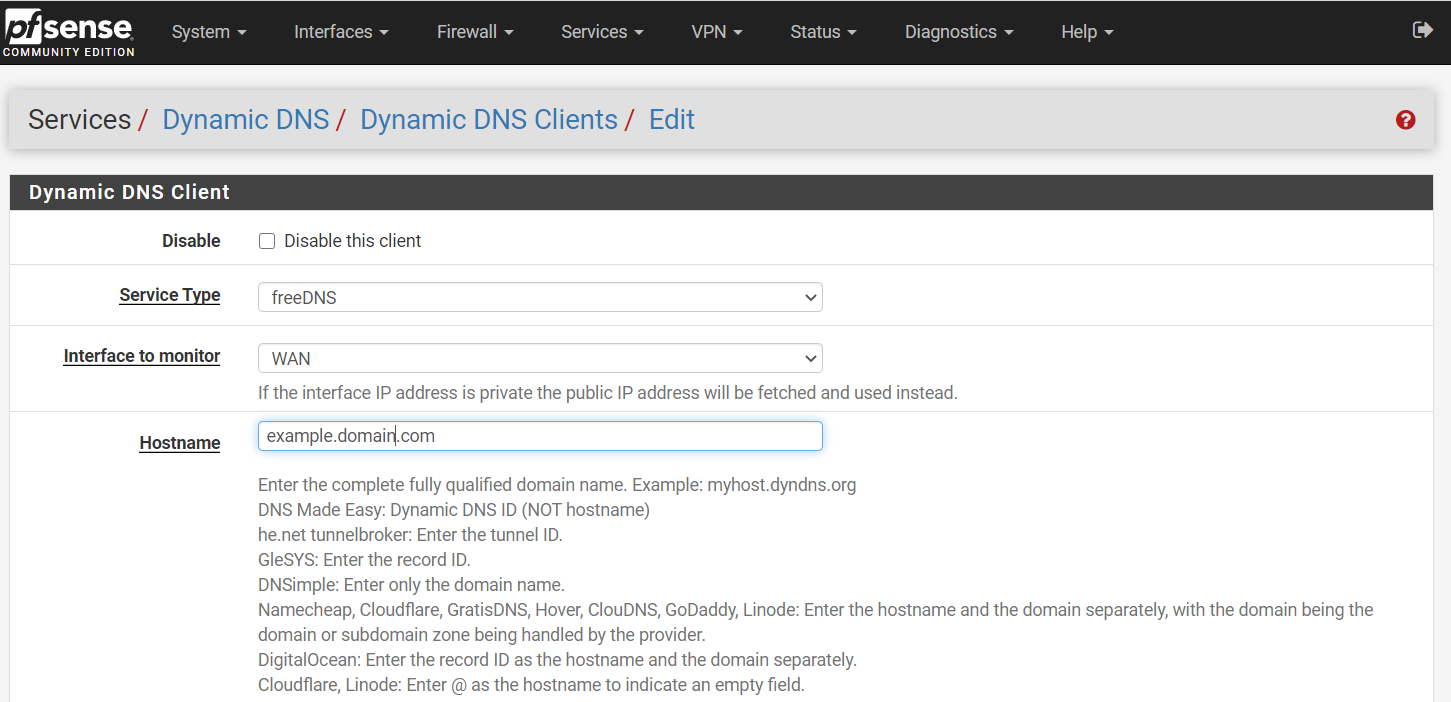
Within PFSense, go to Services -> Dynamic DNS and select Add under Dynamic DNS Clients. If you are using a different Dynamic DNS provider than FreeDNS, look up how to add your dynamic DNS into PFSense. For freeDNS, select “freeDNS” as an option in the service type dropdown menu. Use WAN as the interface and type the full hostname into the hostname parameter. See below for an example:
Use the token from earlier steps creating the freeDNS account and enter it into the password and confirm password parameters. Then save and you should now see your hostname in the Dynamic DNS configuration page with your IP address in green showing it has been updated.
Create Your VPS
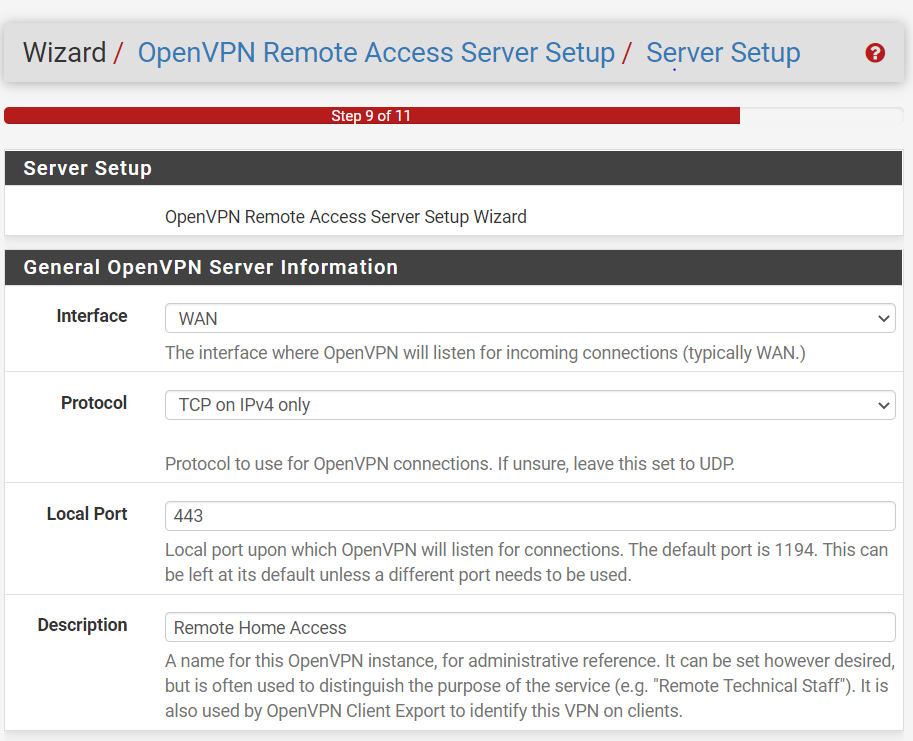
To begin setup, go to VPN -> OpenVPN -> Wizards and go through the wizard creating a VPS for Local User Access. The wizard takes you through the main steps, configuring a Certificate Authority (CA), create a Server Certificate using that CA, then configure OpenVPN Server information. When configuring OpenVPN Server information, you will need to select a port/protocol, create a tunnel network, and specify the local network subnet. You may also need to modify the NCP algorithms to support connecting devices.
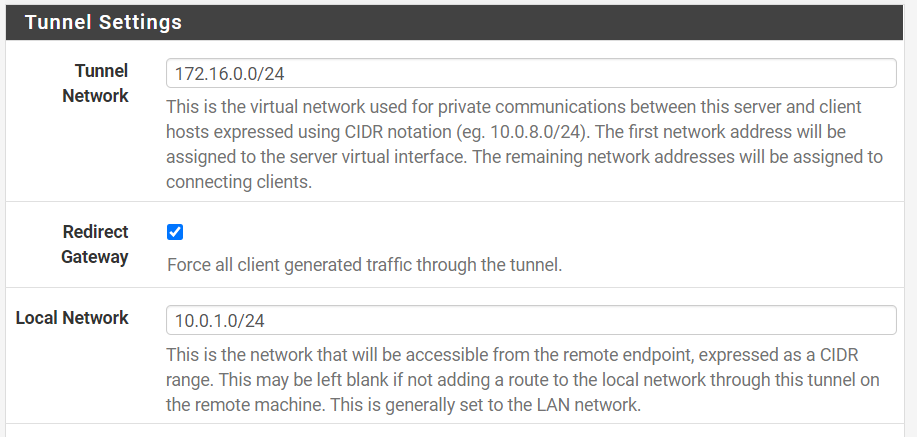
For example, you may want all VPN users to have an address 172.16.0.0/24 and allow them access to your home network at 10.0.1.0/24. Select “Redirect Gateway” if you want to force all traffic through the VPN, this will enforce any firewall/IPS protection to your remote devices. Additionally, you may want to enable Dynamic IP to help keep clients connected while they are on the move.
In the last step, select both options to create firewall rules that allow your VPN to operate properly.
Create Users
To create users, go to System -> User Manager and click add. Enter information for that user and select the Certificate checkbox. Use the VPN certificate authority to generate a client certificate. This will allow the user to connect to the VPN. Repeat to create all the users you would like to have access to the VPN.
Export Client Configurations
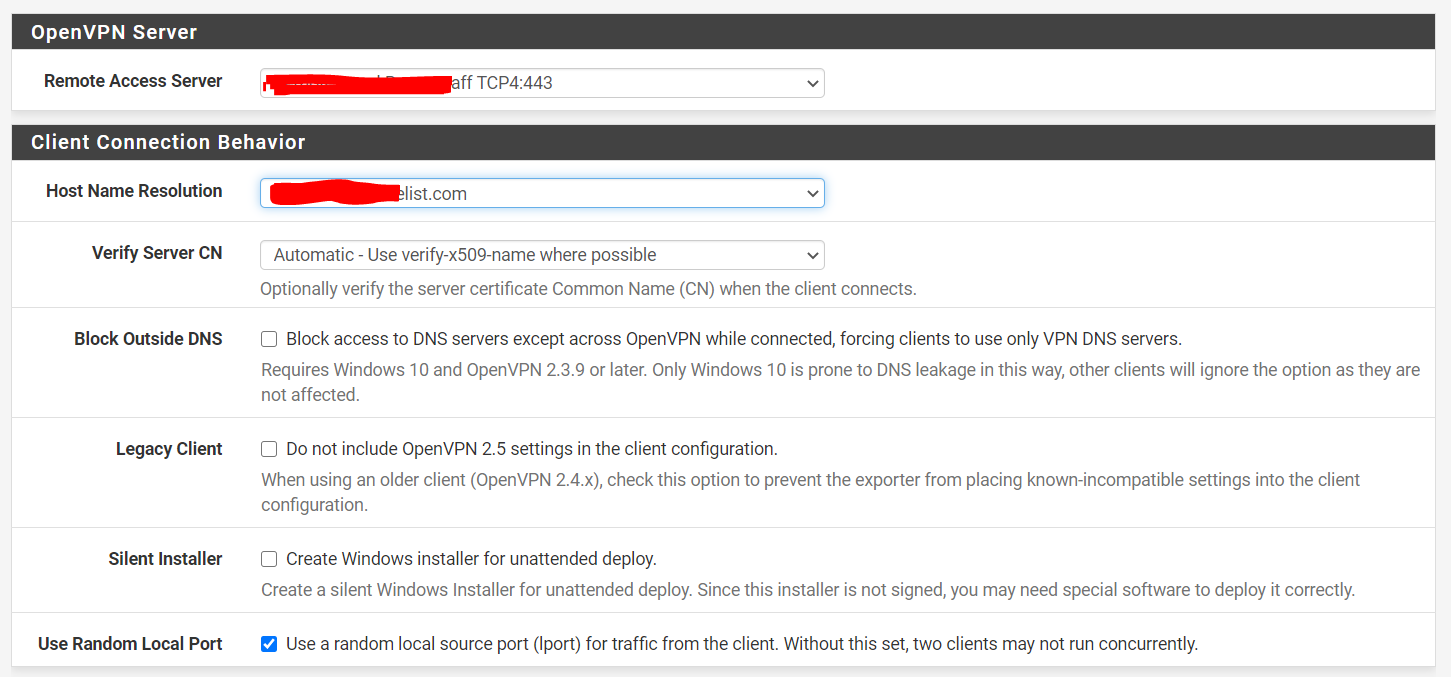
Go to System -> Package Manager -> Available Packages and install openvpn-client-export. When the install finishes, go to VPN -> OpenVPN and you should see a new submenu labeled Client Export. Select the VPN configured previously for Remote Access Server, and the Dynamic DNS hostname. Additionally, you will want to check Use Random Local Port to ensure multiple clients can run at the same time. Save these settings so they will be used for all future client exports. ![]
Scrolling to the bottom will show all the users configured for that VPN as well as options to export a config file for various platforms/operating systems. !
Download these configurations and send them to the people you want to connect, as well as their username and password configured earlier.
Port Forward
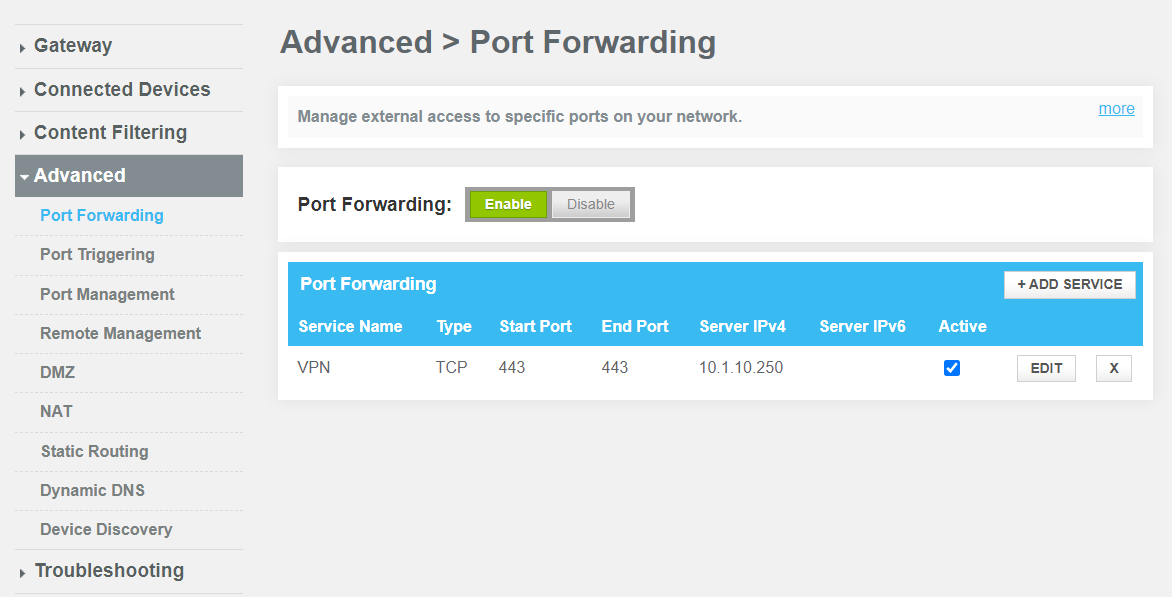
To allow VPN traffic to the PFSense Firewall, port forwarding is required on the modem. By default, OpenVPN uses UDP 1194; however, some ISPs may restrict the ports you are actually allowed to forward. If this is the case, TCP 443 is usually allowed as it is the port HTTPS uses.
Go to your modem configuration page and setup port forwarding. Point the server IP to your PFSense WAN IP address and the TCP or UDP port chosen. Here is an example configuration on a Comcast modem.
Connect Remotely
Download the OpenVPN app on whatever device you use and import your configuration file. That’s it! You can now connect from anywhere in the world back to your home network. This setup can continue to be improved by taking advantage of other PFSense features like Snort, Squid, pfBlocker and others. I highly recommend you attempt to take full advantage of what PFSense has to offer by configuring strict firewall rules and utilizing the more advanced packages.

